I decided a plain white computer was a little too boring. So, here, I made it blue. Note by the way, these pictures were taken a couple of years ago when I was living in college (for the 2rd year), so the setting might seem inconsistent with some more recent pictures.
I chose two colours of paint, a light and a darker blue. The two colours are present on each item.
|
This picture doesn't quite give it justice though, because it was a little dark down here where I shot the picture. The paint is car metallic paint, so it works best in bright light. On a sunny day I'll have to take it outside and do some more pictures. The best feature of this part is the fading from light to dark down the case. That part really doesn't come out well on the photo.
|
|
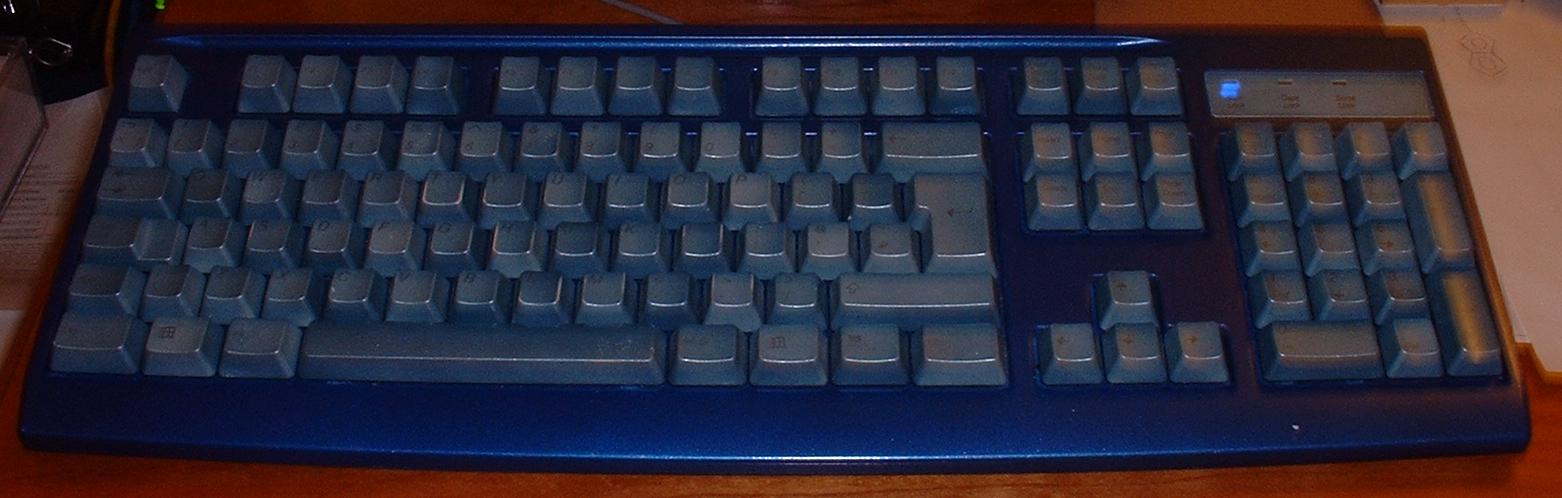
The keyboard. Don't ask how long it took me to spray all those keycaps (all 105 of them). But trust me, it's not for those of little enthusiasm. I'm somewhat disappointed in the keyboard now though; the paint is starting to chip off the main part (the darker colour). And the lighter paint on the keycaps is wearing a little thin on some keys; despite the many layers of lacquer I added. And, the keyboard looks a lot darker in this picture than it really is.
|
|
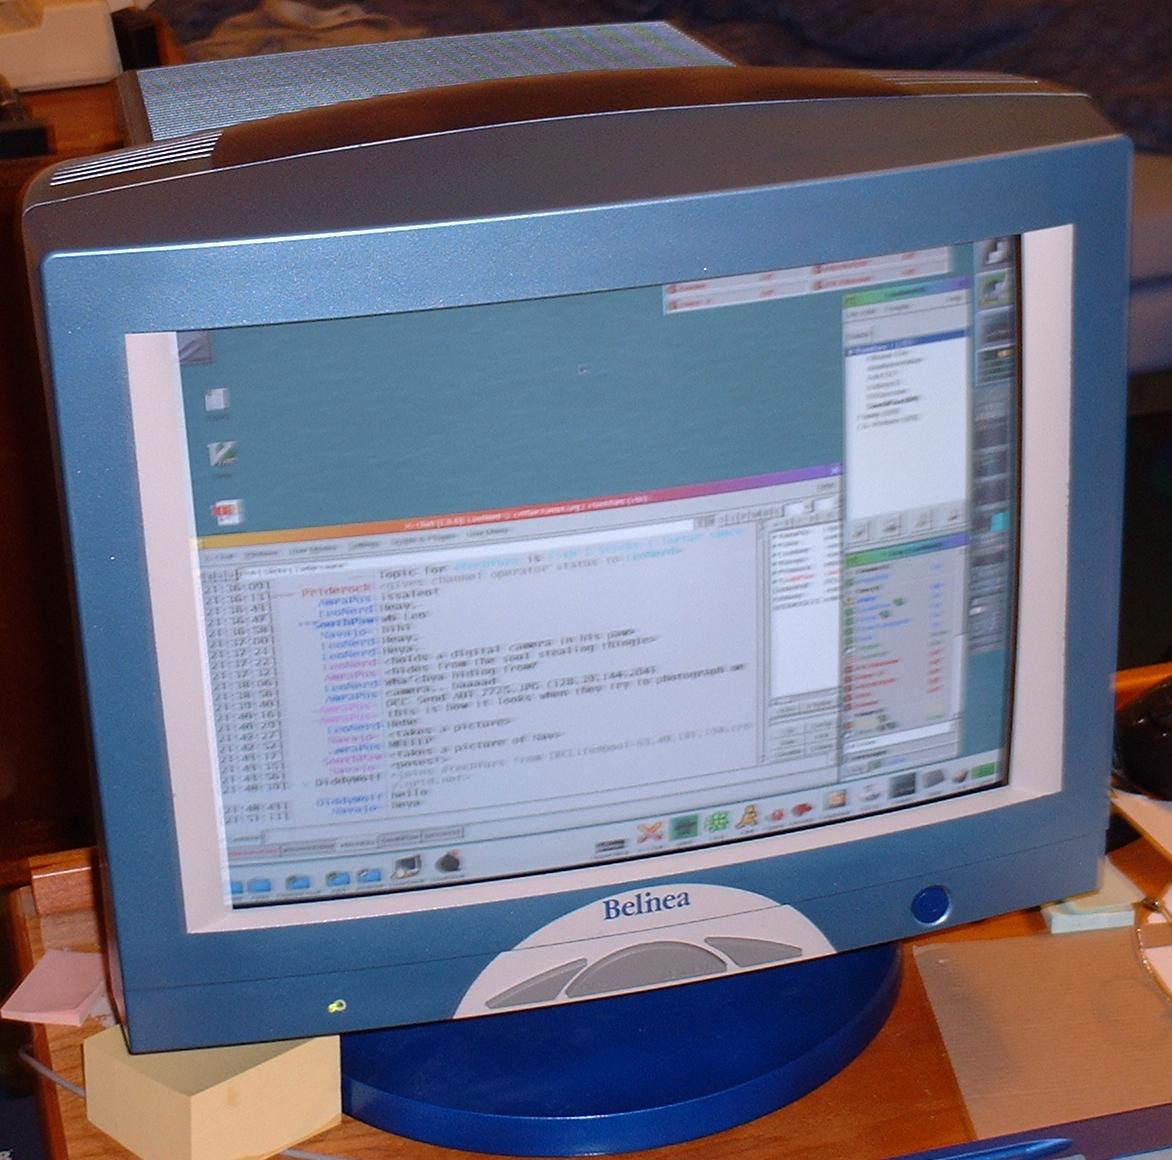
The front of the monitor only really has the light colour. That's because the darker colour is on the monitor's stand, and on the sides and top. The white curve part at the bottom where the buttons are was achieved with a paper and tape mask, made using a dinner plate. Special thanks to my mum for letting me borrow it. :)
|
|
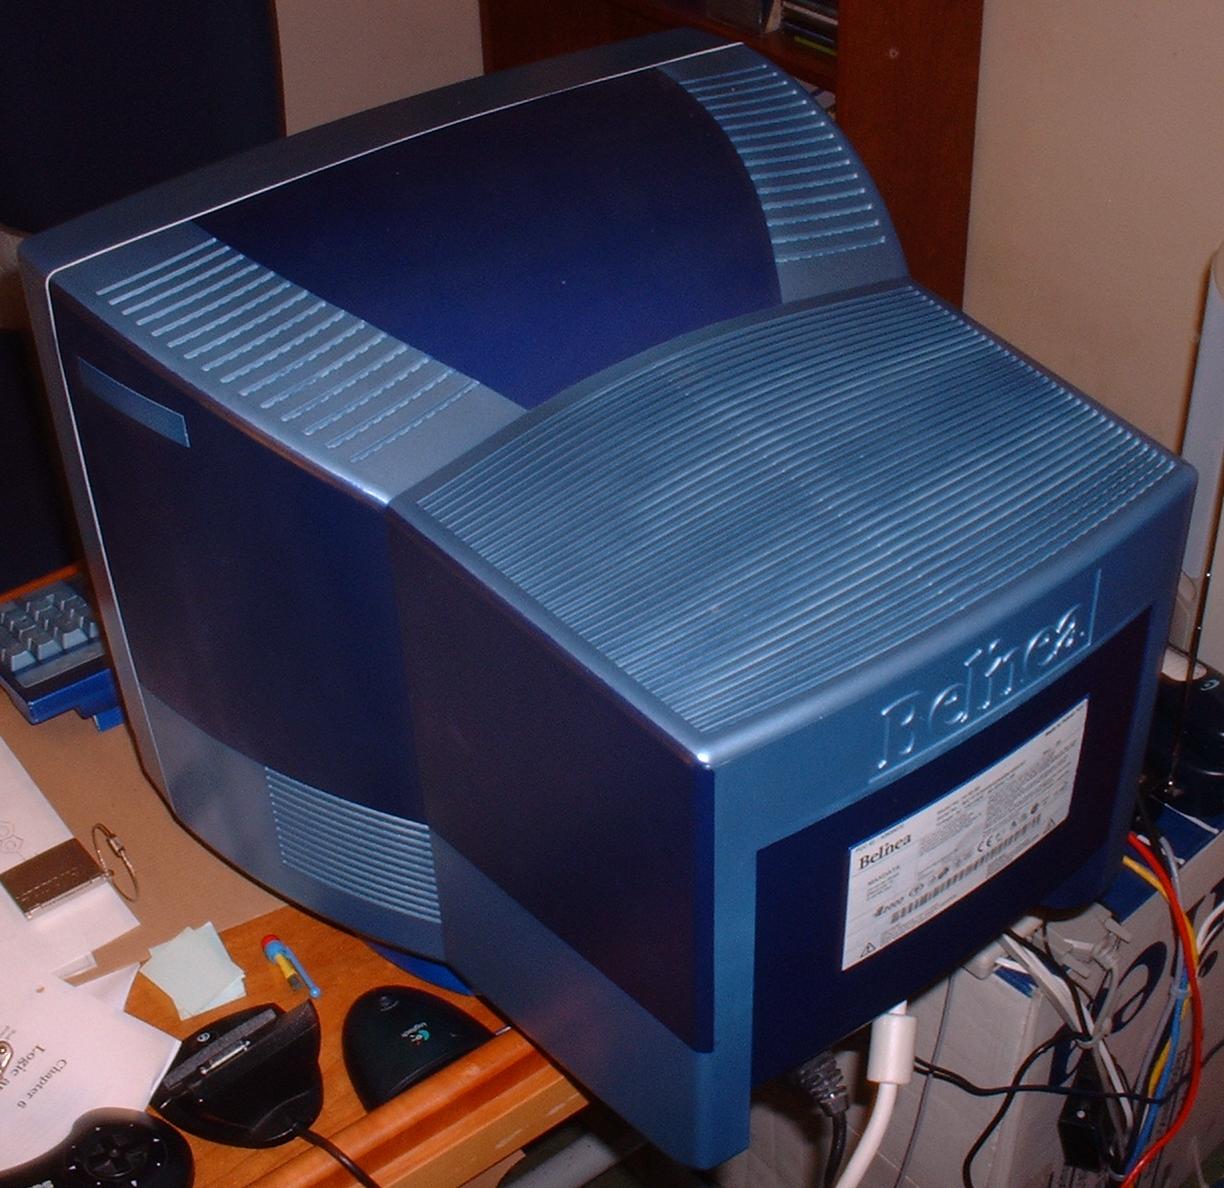
The back of the monitor. In my opinion much better than the front. Here you can see the two colours. I decided to go for sharp lines in this piece, rather than the gentle fade. This was done by painting the light areas, and then masking them over with paper and tape, to do the darker areas.
|
A few notes for anyone wishing to do a similar thing with their computer:
And a couple of safety points: